TL, DR
Ubuntu Multipass gives you the ability to create virtual machines on Linux, Windows and MacOS. It provides an image with Docker and Portainer pre-installed, so you can have a local Docker development environment with GUI in no time. Below a few commands to guide your first steps with Multipass and launching the Portainer interface.
Multipass
Ubuntu Multipass is the latest tool from Canonical to provide every developer with local Virtual Machines orchestration capabilities. It runs on Linux, Windows and MacOS, and lets you create locally as many Ubuntu VMs as you wish.
In each of the different operating systems Multipass leverages their native hypervisor, providing an homogeneous level of abstraction for your Ubuntu VMs.
On Linux you can install it as a Snap (you can find more information about installing the underlying snapd service at this link) with the following command from the terminal:
sudo snap install multipassFor MacOS and Windows you can download the installer from Ubuntu Multipass website (link). The rest of this guide assumes you are using Multipass on Linux, but you can use it as a general reference for the other OSs as well.
Once the installation is done, you can start using Multipass straight away to create Ubuntu Virtual Machines. The tool automatically creates a first image – named primary – with Ubuntu LTS and mounting your home directory into the VM.
Multipass basic commands
find
The first thing you may want to do is to check what VM images are available with Multipass. Open your terminal and type:
multipass findIn February 2022 those are the options provided:
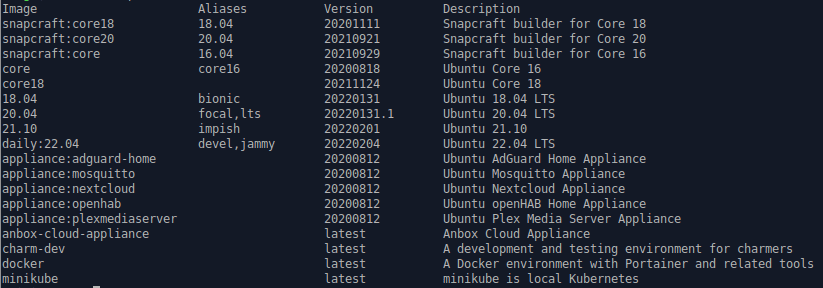
You can see there are a few options to launch pre-configured VMs with some software already installed.
launch
After checking the available images, all you need to do to launch a new image with Docker pre-installed is to type on your terminal:
multipass launch dockerIf it’s the first time you launch this specific VM image you will have to wait some time for Multipass to download, setup, and launch the instance.
list
Great, you launched a VM with Docker on it! Now you’ll have to figure out what happened in your system. To get an overview of Multipass situation you can type in your terminal:
multipass listThis is the output I got (I already stopped my primary instance, more on this below in the post):

You can see there is a docker image running, with a couple of IP addresses.
info
Let’s dig a bit more on our docker VM. You can get a more detailed picture executing this command in your terminal:
multipass info dockerThis is the output I got, yours should be fairly similar:
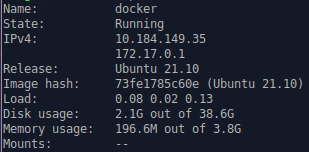
We didn’t mount any directory, therefore the last item of the list is empty. In this tutorial we are not going to show directory mounting, but you can see in the documentation how it is done link.
Also, it’s not clear to me why there are 2 IP addresses…and also in the documentation I could not find any reference.
shell
Finally, let’s start to operate with the new VM we created. In order to access the VM command line you need to use this command in your terminal:
multipass shell dockerThis will open the VM command line, providing you with a familiar Ubuntu login screen like the one below.

You can see that the login screen provides you with some additional information about superuser privileges. In Multipass VMs you can execute commands as superuser (sudo) without any password.
As we already said, the Docker VM on Multipass comes pre-configured with a Portainer instance already running. We can check this from the VM command line typing:
docker ps -aWe will not introduce or describe Docker commands in this tutorial. Just for your reference, ps is the command to list all running Docker containers in the system. The -a flag makes it list also all exited containers. This is the output I got:

We can see that the portainer container has its port 9000 bound with its host VM. Therefore, we can use that as access point for our Portainer instance!
Portainer
Do you prefer GUIs to command line? Most of us beginners do, no matter what CLI gurus think. Yes, GUI is an overhead on your system load. But it makes things much clearer when you start using a new tool and you don’t even know all of its capabilities.
Portainer provides you a management portal for Docker (and Kubernetes as well), where you can see your instance, launch pre-configured applications, and much more. You can find all Portainer documentation here. For the rest of our tutorial we will use Portainer’s Community Edition.
Access and configure Portainer
For our first access we will need to configure the Portainer instance and create our first user. Using the IP you recovered with the previous multipass info docker command and the port listed by docker ps -a, we open our browser to navigate there.
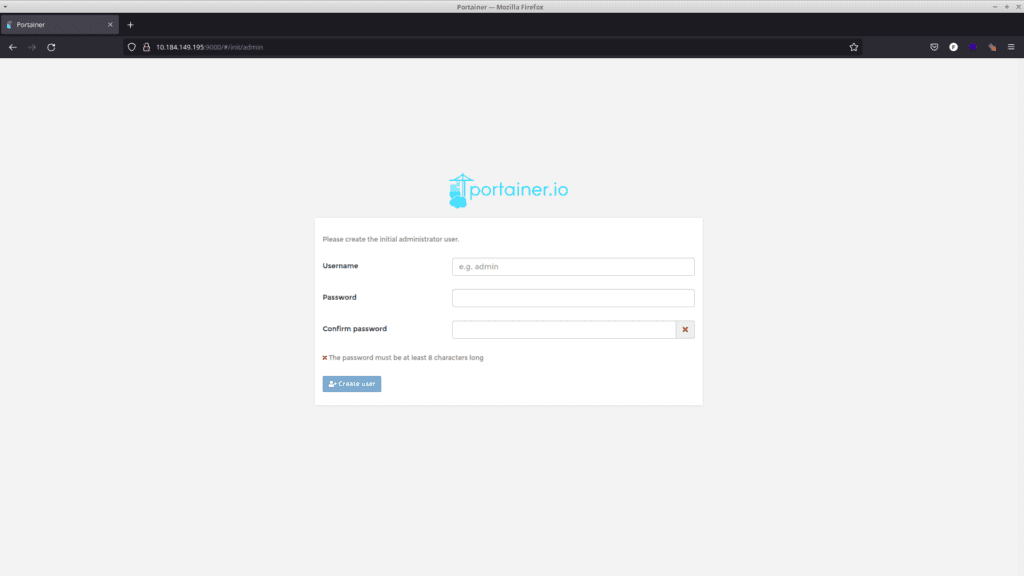
Note: The image above has a different IP address compared to commands above, because I deleted and recreated the docker VM while taking screenshots for this post.
At this point we can create a new administrator user for our Portainer instance. Once we do so, we will access another configuration page.
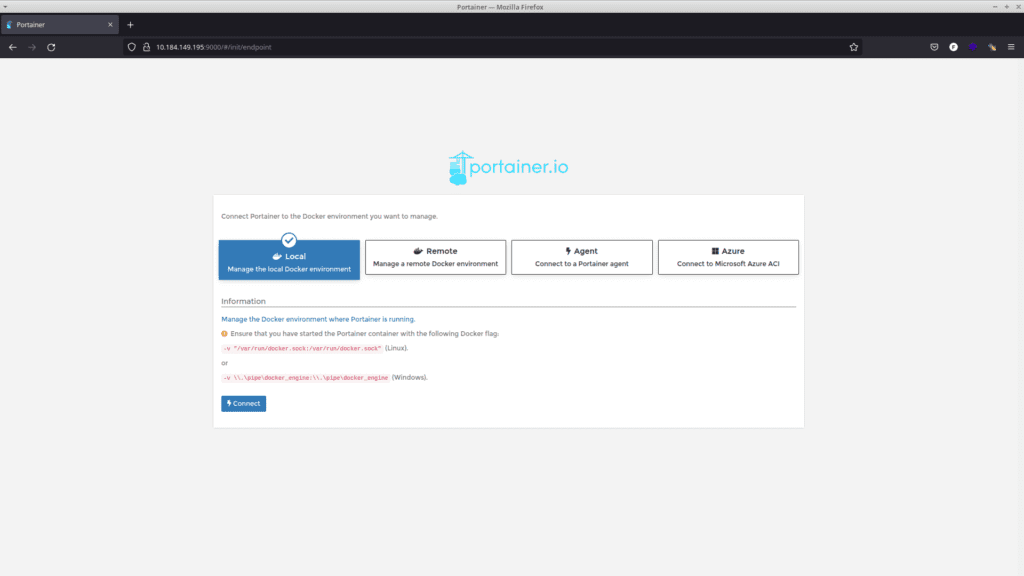
We select “Local” as environment to be managed by our Portainer instance. And we are good to go! The next page will show us the Portainer home, from where we can start our journey with Docker.
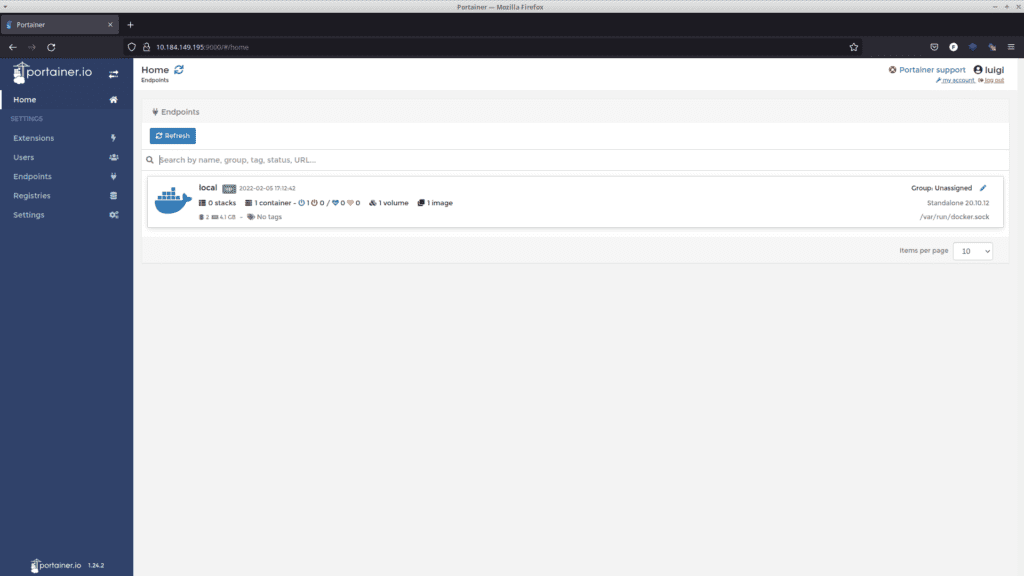
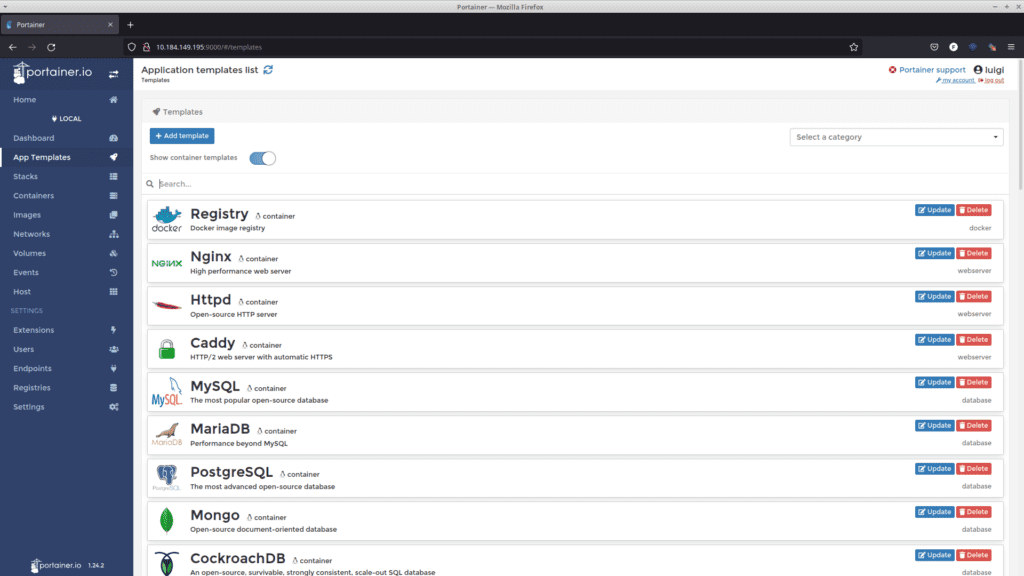
If we click on our local environment and then on “App Templates”on the left bar, we will see all the app templates that we can deploy with one click.
Don’t forget to clean up
Spinning VMs will consume our computer or server resources. In order to keep things tidy and usable, we should clean up once we are done using the VMs we created.
The first thing to do is to stop the VMs, in this case the docker one. The command is the following:
multipass stop dockerIn case we are done with those VMs, we can go one step further and remove them from our local storage. There are two consecutive commands for this purpose:
multipass delete docker
multipass purge
The first one will mark the VM for deletion, and the second one will remove all deleted VMs from our local storage.
Related links
Do you like our content? Check more of our posts in our blog!